
Hi folks!
This post is about some awesome window silhouettes my partner and I made for Halloween in 2013! They are really eye-catching outside!
The Project
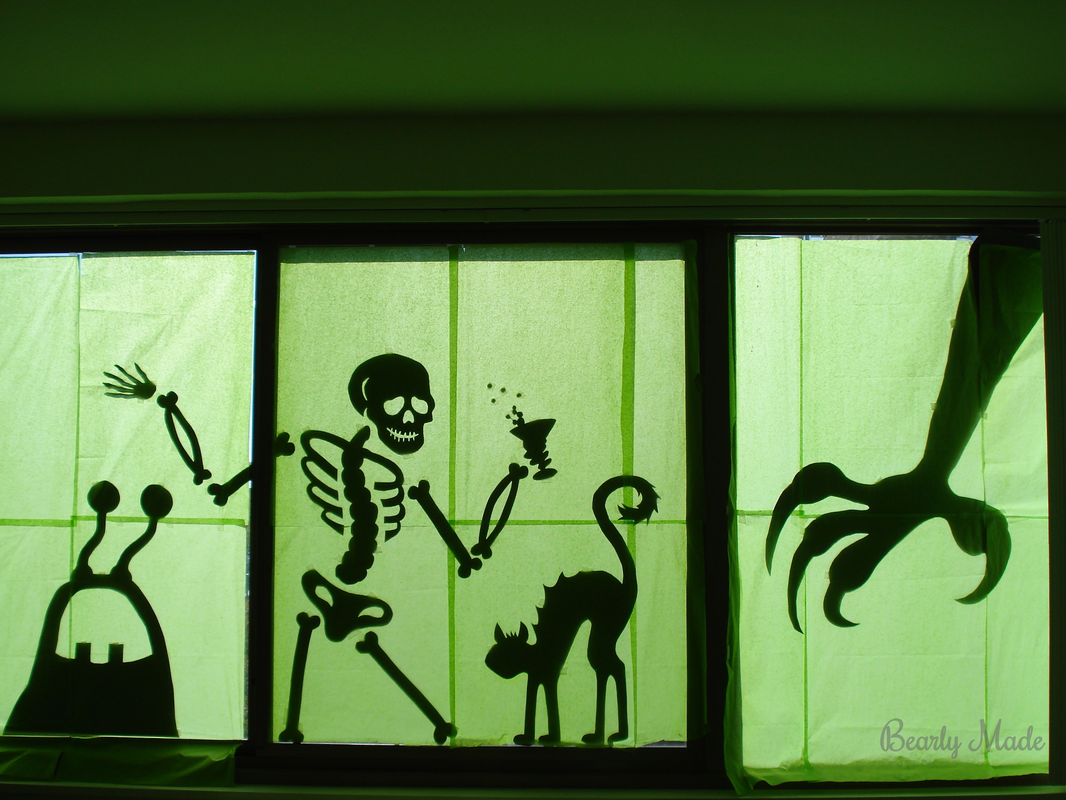
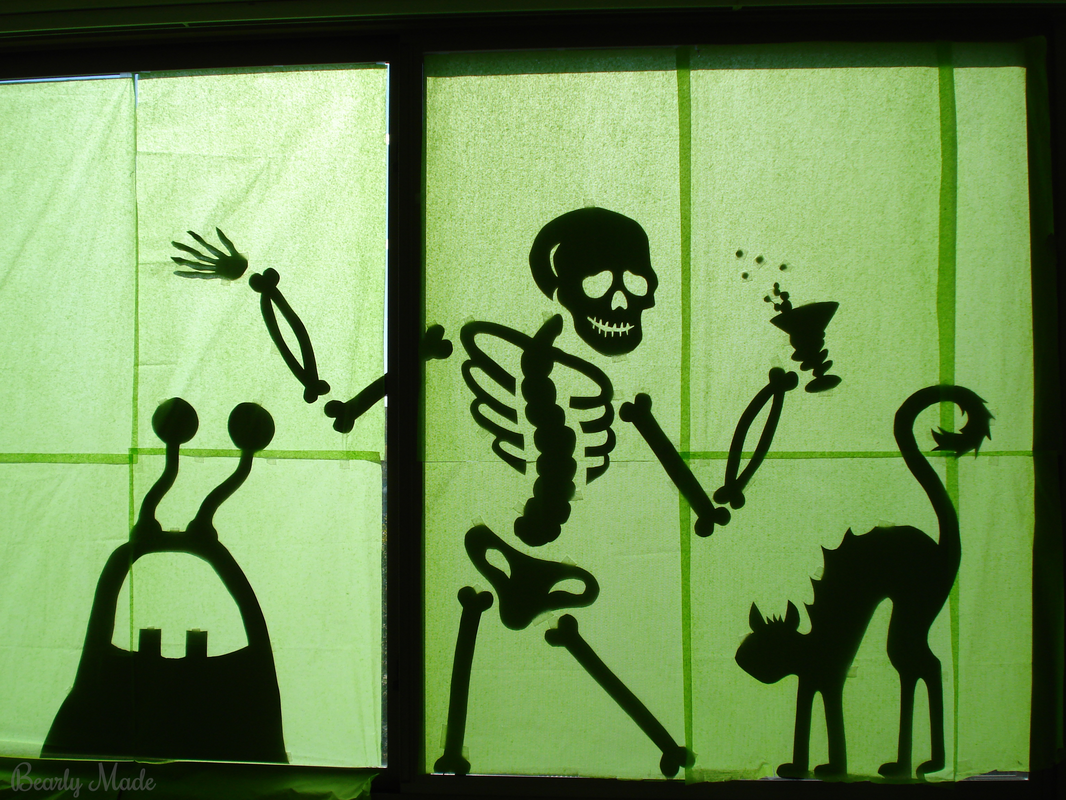
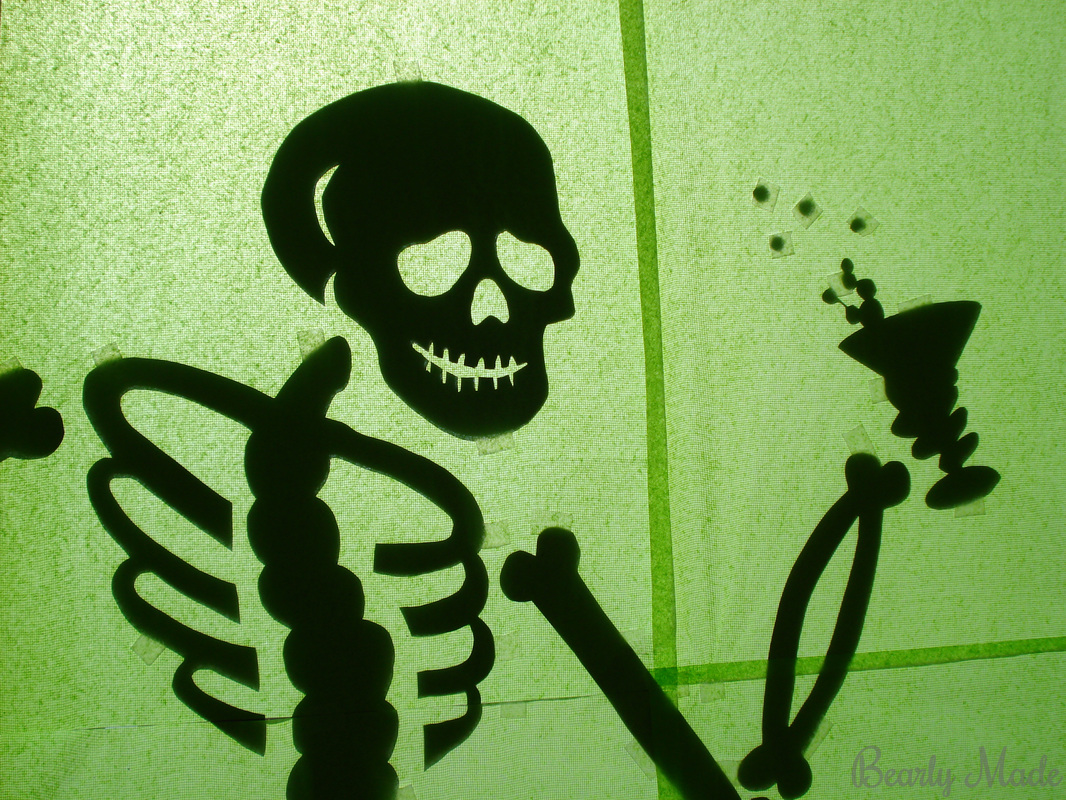
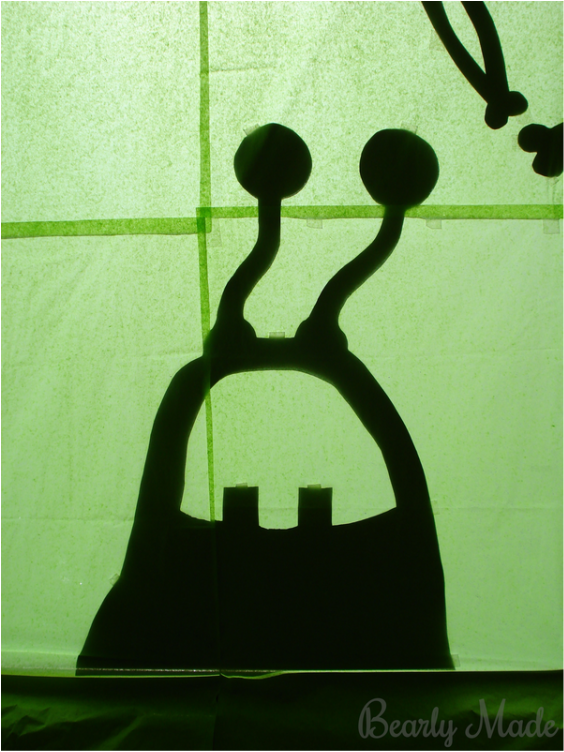
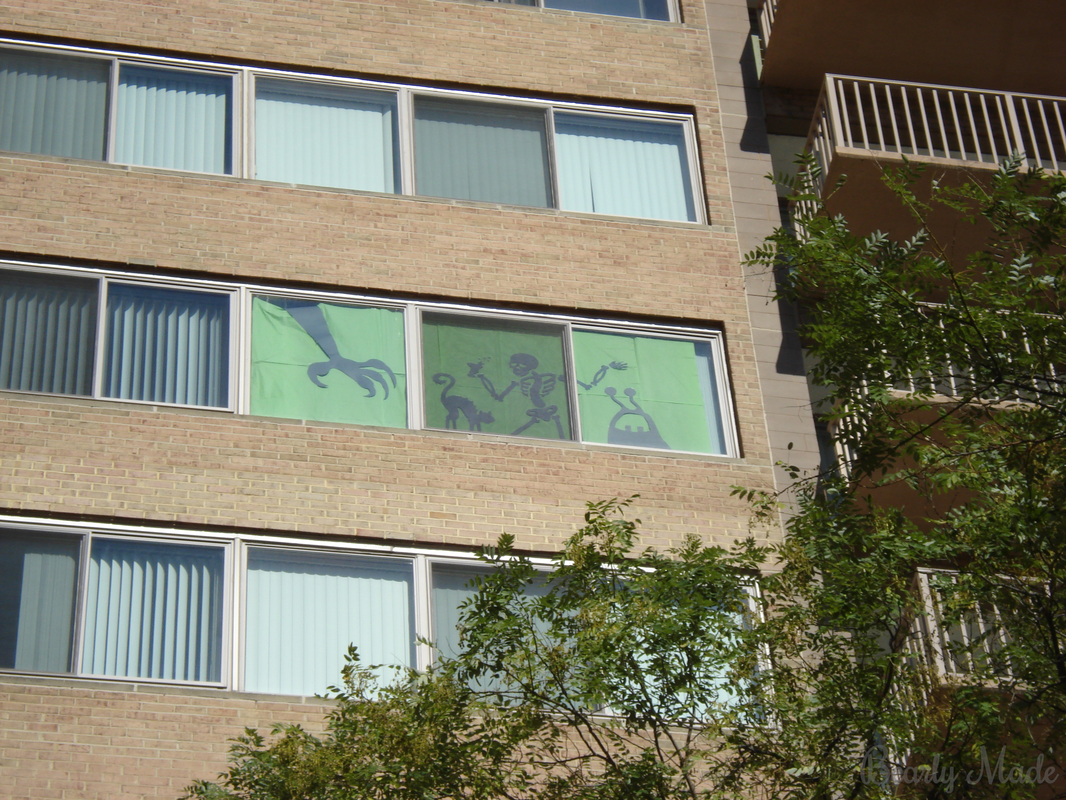
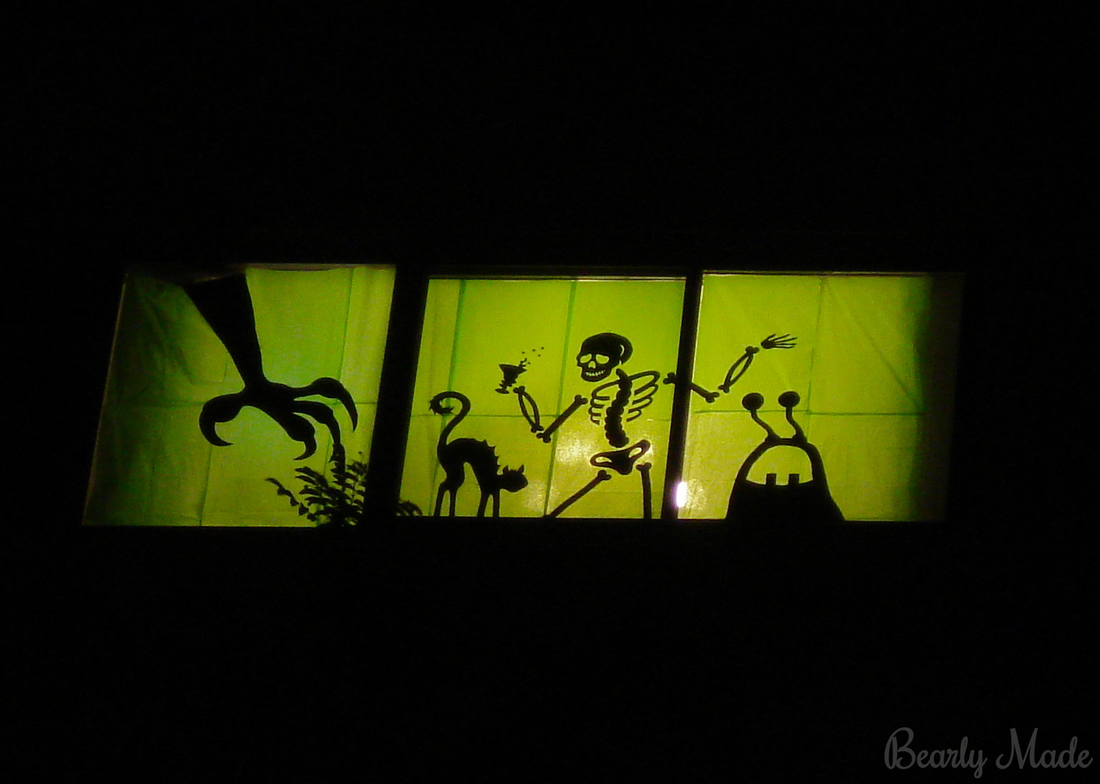
First, here is what the finished product looks like.
Materials
Black poster board (I got mine at Staples.)
Green tissue paper (I used bright lime green tissue paper 20” x 30”, which I got here.)
Paper
Pencil
Eraser
Ruler
Scissors
Scotch tape
For the poster board, I believe I got size 20” x 28”. I used the poster board that is similar to very thick cardstock, not the poster board that is super-duper thick and made of foam.
Note that a lot of poster board at Staples is one color on the front and a different color on the back. Be sure to get poster board that is black on both sides so you can enjoy the silhouette effect both inside and outside your home.
Drawing Your Characters
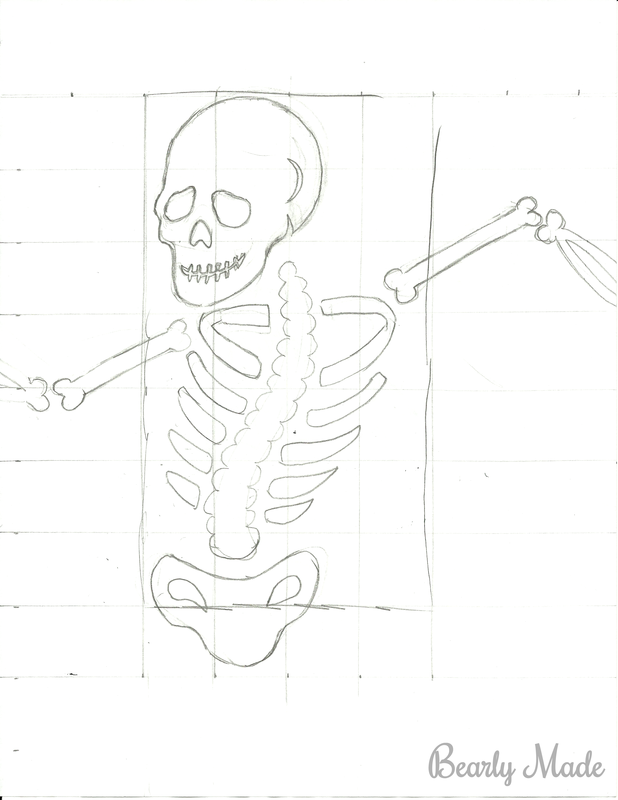
1. First, you should figure out what characters you want to make. I thought of cute characters and how I wanted them to interact. I loosely sketched out the features I wanted them to have. My partner has a knack for sketching, so he redrew the characters and cleaned them up.
2. We looked at our poster board and our windows to figure out how big we wanted to make our silhouettes.
3. We drew grids on the sketches and our poster board, and then we drew the characters onto the poster board. If you aren’t familiar with scale drawing using a grid, you can find a how-to article here and an example here.
Scale drawing is a process that can take a couple of minutes. When I was working on this project, I ended up using a different scale for each character.
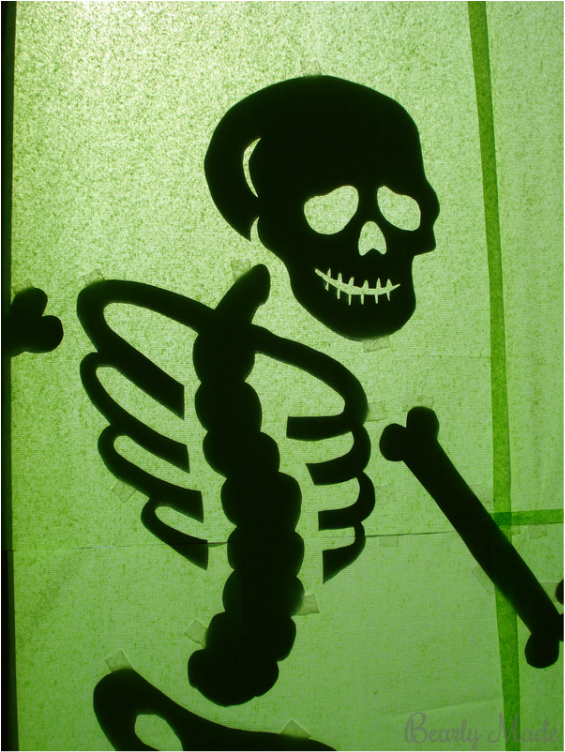
I didn't know I would be writing a post when I did this project, so I am trying to remember some details. I am going to give you an example, but my numbers are only approximations. For example, I looked at my window (about 58 inches tall) and decided I wanted my skeleton to be about 38 inches tall (about 25 inches from the top of the head to the bottom of the spine). I decided that based on the size of my sketch (a little more than 7 inches tall) and the size I wanted the silhouette to be, that 1:4 would be a good ratio. So, I drew a 1-inch grid on my sketch, and a 4-inch grid on my poster board. Then I copied what was in each square of the sketch into each square on the poster board.
Don't worry about getting gridlines on your silhouettes. They don't stand out on the black poster board.
If you compare the sketch of the skeleton to the silhouette of the skeleton, you can probably tell that we made additional edits. My talented partner made some adjustments as he was transferring the sketches to the poster board, and he made some edits to my poster board drawings as well. I will add that my partner is not a trained artist, he just has a little bit more practice than I do, because he used to sketch for fun back in the day. This is totally a project you could do well with no real artistic experience!
2. We looked at our poster board and our windows to figure out how big we wanted to make our silhouettes.
3. We drew grids on the sketches and our poster board, and then we drew the characters onto the poster board. If you aren’t familiar with scale drawing using a grid, you can find a how-to article here and an example here.
Scale drawing is a process that can take a couple of minutes. When I was working on this project, I ended up using a different scale for each character.
I didn't know I would be writing a post when I did this project, so I am trying to remember some details. I am going to give you an example, but my numbers are only approximations. For example, I looked at my window (about 58 inches tall) and decided I wanted my skeleton to be about 38 inches tall (about 25 inches from the top of the head to the bottom of the spine). I decided that based on the size of my sketch (a little more than 7 inches tall) and the size I wanted the silhouette to be, that 1:4 would be a good ratio. So, I drew a 1-inch grid on my sketch, and a 4-inch grid on my poster board. Then I copied what was in each square of the sketch into each square on the poster board.
Don't worry about getting gridlines on your silhouettes. They don't stand out on the black poster board.
If you compare the sketch of the skeleton to the silhouette of the skeleton, you can probably tell that we made additional edits. My talented partner made some adjustments as he was transferring the sketches to the poster board, and he made some edits to my poster board drawings as well. I will add that my partner is not a trained artist, he just has a little bit more practice than I do, because he used to sketch for fun back in the day. This is totally a project you could do well with no real artistic experience!
Final Steps
4. We cut out our silhouettes.
5. We used scotch tape to affix the pieces to the inside of the window. (It all came off pretty easily after Halloween, even though the sun often heated the tape. I did go over the windows with Method glass cleaner and a rag to get some of the sticky off.)
6. We neatly taped a layer of green tissue paper over the silhouettes, trying not to overlap too much.
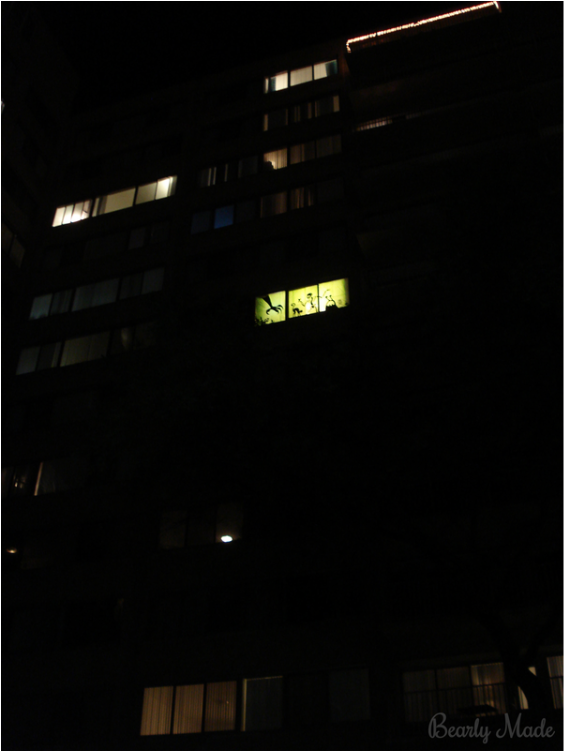
7. On Halloween, we put an extra lamp behind the window to get the silhouettes to stand out.
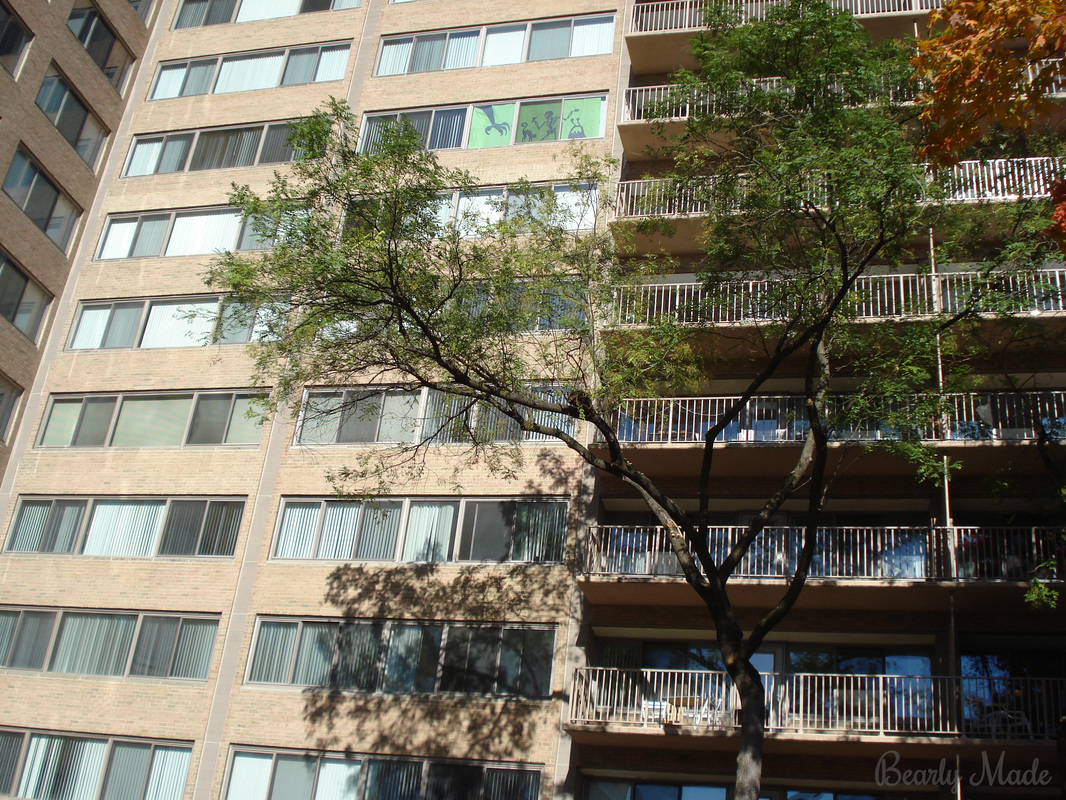
That’s it! The tissue paper over the window gave the whole room a creepy green hue leading up to Halloween. It's the kind of thing a kid would probably love to have in their room!
5. We used scotch tape to affix the pieces to the inside of the window. (It all came off pretty easily after Halloween, even though the sun often heated the tape. I did go over the windows with Method glass cleaner and a rag to get some of the sticky off.)
6. We neatly taped a layer of green tissue paper over the silhouettes, trying not to overlap too much.
7. On Halloween, we put an extra lamp behind the window to get the silhouettes to stand out.
That’s it! The tissue paper over the window gave the whole room a creepy green hue leading up to Halloween. It's the kind of thing a kid would probably love to have in their room!
Storage
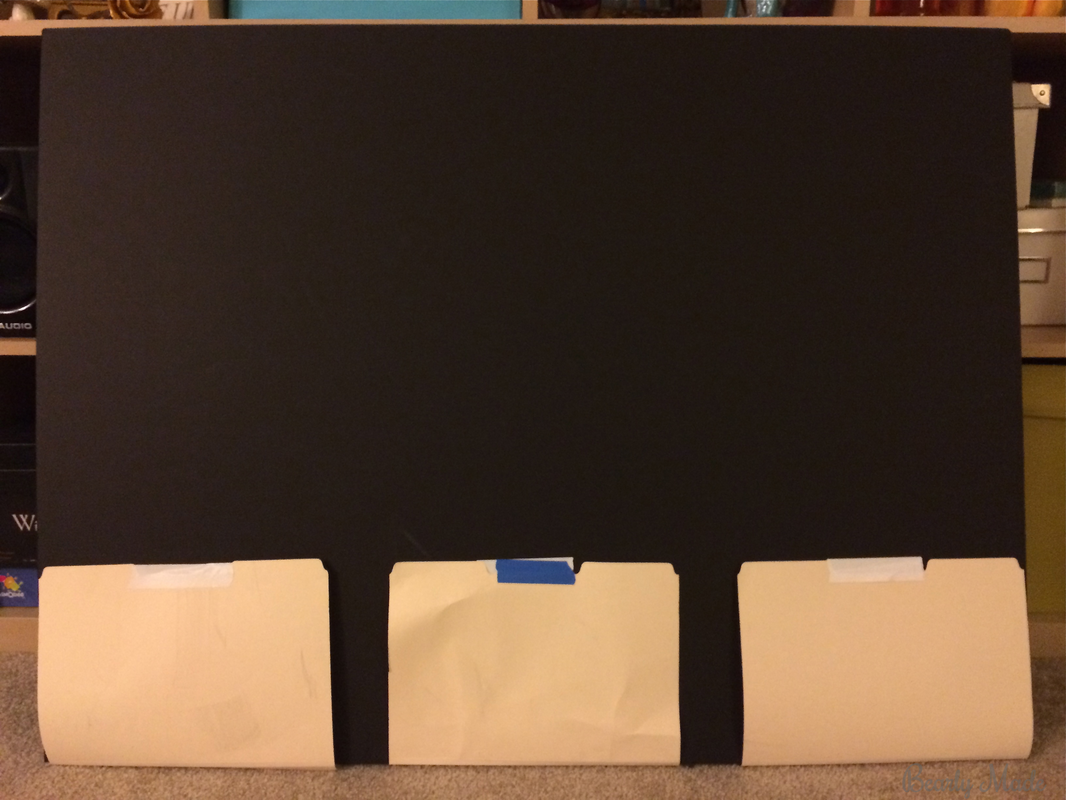
This is a decoration I want to use for years to come! I stored some of the pieces in a manilla file folder, but some of the pieces are too large for that. I made a makeshift portfolio using three manilla file folders, two thick foam poster boards, and tape.
Inspiration and Resources
Martha Stewart has made some great silhouettes. It's out of stock now, but you can see her headless woman silhouette here and spooky bird silhouettes here.
You can find my Pinterest board, Halloween Silhouettes, here.
If you aren’t familiar with scale drawing using a grid, you can find a how-to article here and an example here.
You can find my Pinterest board, Halloween Silhouettes, here.
If you aren’t familiar with scale drawing using a grid, you can find a how-to article here and an example here.
Downloads
You can download some of my partner's sketches for free below.
| Halloween Sihouette Sketches.pdf |
Gallery

Thanks for reading!
Try making Halloween window silhouettes of your own and share your results in the comments below!
Warm wishes,
Alex
Warm wishes,
Alex
 RSS Feed
